

How To Install Vinyl Wall Base Outside Corner
Materials Needed to Install Vinyl Wall Base
- Enough linear feet of vinyl wall base, for your project. Factor in around 5-10% scrap.
- Utility knife
- Wall base adhesive
1 x 30 oz. cartridge is good for 60 linear feet of base
1 x Quart of base adhesive is good for 60 linear feet of base
1 x Gallon of base adhesive is good for 240 linear feet of base
- Application equipment, for applying base adhesive
method A - cartridge gun and snozzle (pictured)
method B - cartridge gun and spreader
method C - spreader with a tub of adhesive (either 1 quart or 1 gallon tub)
- Speed square (optional)
- Cutting surface (any scrap piece of wood)
- Wet rag

Steps to Install Vinyl Wall Base
- Butt the end of the roll up to the wall.
- Unroll the roll of vinyl wall base the length of the wall, in order to estimate the length.
- Mark where to make your cut, but give yourself a couple extra inches.
- Make a square cut.

- You should now have an unrolled length of dry back vinyl wall base that is roughly the length of the wall.

- Make sure that the toe of the vinyl wall base is towards the wall with the finished side down, meaning the ribbed side is up.

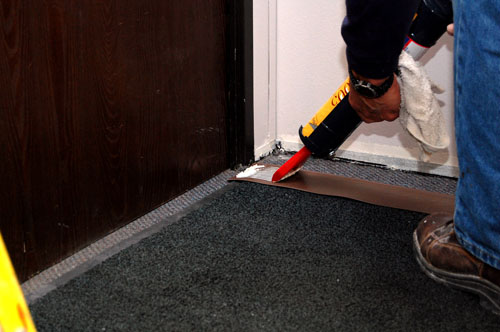
- For these instructions we will use the adhesive gun and the 30 oz. adhesive cartridge with the snozzle attachment.
- You can accomplish the same application of adhesive with the gun and spreader, or the spreader with a tub of adhesive.
- Puncture the adhesive cartridge with needle on the adhesive gun.
- Insert cartridge into the guy and apply the snozzle.
- Begin pulling the trigger of the adhesive gun to push adhesive through the snozzle.
- Once adhesive is coming through the snozzle, we are ready to apply the adhesive to the vinyl wall base. With a smooth consistent pressure, pull the gun trigger to apply adhesive on the vinyl wall base.
- Slowly and steadily work your way down the length of the wall.

- Finish that down the entire length of the vinyl wall base.
- We should now have a piece of base that has adhesive, side up, the entire length of the wall.
- Go back to the starting edge and begin to press the adhesive side of the base to the wall. Press firmly.

- Press firmly down the entire length of the base.

- Clean up and wipe down the excess adhesive with a wet rag.
- Run the wet rag down the entire length of the base.

- There should be some excess base at the second end of the wall. Using your speed square, cut off the excess.

- Congrats! you should now have an entire wall length of vinyl wall base installed.

- Now, the hard part, finish an inside corner. Cut a length of base the correct size, leaving some scrap, like you did earlier in the instructions.
- On the side that will make an inside corner, use your speed square to cut the toe of the base at a 45 degree angle.

- Cut with utility knife.

- Apply adhesive.
- Butt the side of base with the 45 taken out of it, against the wall.

Congrats! You have finished an inside corner.
How To Install Vinyl Wall Base Outside Corner
Source: https://www.wallprotex.com/inspiration/how-to-install-vinyl-wall-base
Posted by: byerswitterlass.blogspot.com
0 Response to "How To Install Vinyl Wall Base Outside Corner"
Post a Comment